How To Connect To Raspberry Pi Using Remote IT: A Comprehensive Guide
Connecting to Raspberry Pi remotely can be a game-changer for hobbyists, developers, and IT professionals alike. Remote access allows you to manage and control your Raspberry Pi from any location, making it an essential skill for anyone working with this versatile device. Whether you're setting up a home server, automating tasks, or running IoT projects, knowing how to connect to Raspberry Pi using Remote IT simplifies your workflow and enhances productivity.
Raspberry Pi has become one of the most popular single-board computers due to its affordability, flexibility, and ease of use. However, accessing it remotely requires some setup and understanding of the tools available. This article will guide you step-by-step on how to connect to Raspberry Pi using Remote IT, ensuring you can access your device securely and efficiently from anywhere in the world.
By the end of this guide, you'll not only understand the basics of remote connections but also gain insights into best practices and troubleshooting tips. Let's dive into the world of remote Raspberry Pi management and unlock its full potential.
Table of Contents
- Introduction to Remote IT and Raspberry Pi
- Setting Up Your Raspberry Pi for Remote Access
- What is Remote IT?
- Installing Remote IT on Raspberry Pi
- Ensuring Proper Connectivity
- Security Best Practices
- Troubleshooting Common Issues
- Alternative Remote Access Solutions
- Real-World Use Cases
- Conclusion and Next Steps
Introduction to Remote IT and Raspberry Pi
Raspberry Pi is a powerful yet compact device that can be used for various applications, from home automation to advanced robotics. However, physically accessing your Raspberry Pi every time you need to make changes or check its status can be inconvenient. This is where Remote IT comes in.
Why Use Remote IT?
Remote IT offers a secure and straightforward way to access your Raspberry Pi from anywhere. Unlike traditional remote desktop solutions, Remote IT provides a seamless experience without requiring complex configurations or port forwarding. Here are some reasons why Remote IT stands out:
- Simple setup process
- Highly secure connection
- Supports multiple protocols
- Compatible with various devices
Setting Up Your Raspberry Pi for Remote Access
Before diving into Remote IT, it's essential to ensure your Raspberry Pi is properly configured for remote access. Follow these steps to prepare your device:
Step 1: Install Raspberry Pi OS
Begin by installing the latest version of Raspberry Pi OS on your device. This operating system is optimized for Raspberry Pi and includes essential tools for remote access.
Step 2: Enable SSH
SSH (Secure Shell) is a protocol that allows you to securely connect to your Raspberry Pi via the command line. To enable SSH, follow these steps:
- Open the Raspberry Pi Configuration tool
- Navigate to the "Interfaces" tab
- Select "SSH" and enable it
Step 3: Connect to the Internet
Ensure your Raspberry Pi is connected to a stable internet connection. You can use either Ethernet or Wi-Fi, depending on your setup.
What is Remote IT?
Remote IT is a cloud-based service designed to simplify remote access to devices like Raspberry Pi. It eliminates the need for complicated configurations such as port forwarding or static IP addresses, making it an ideal solution for beginners and experts alike.
Key features of Remote IT include:
- Easy-to-use web interface
- Support for multiple protocols (SSH, VNC, etc.)
- Highly secure encryption
- Device management capabilities
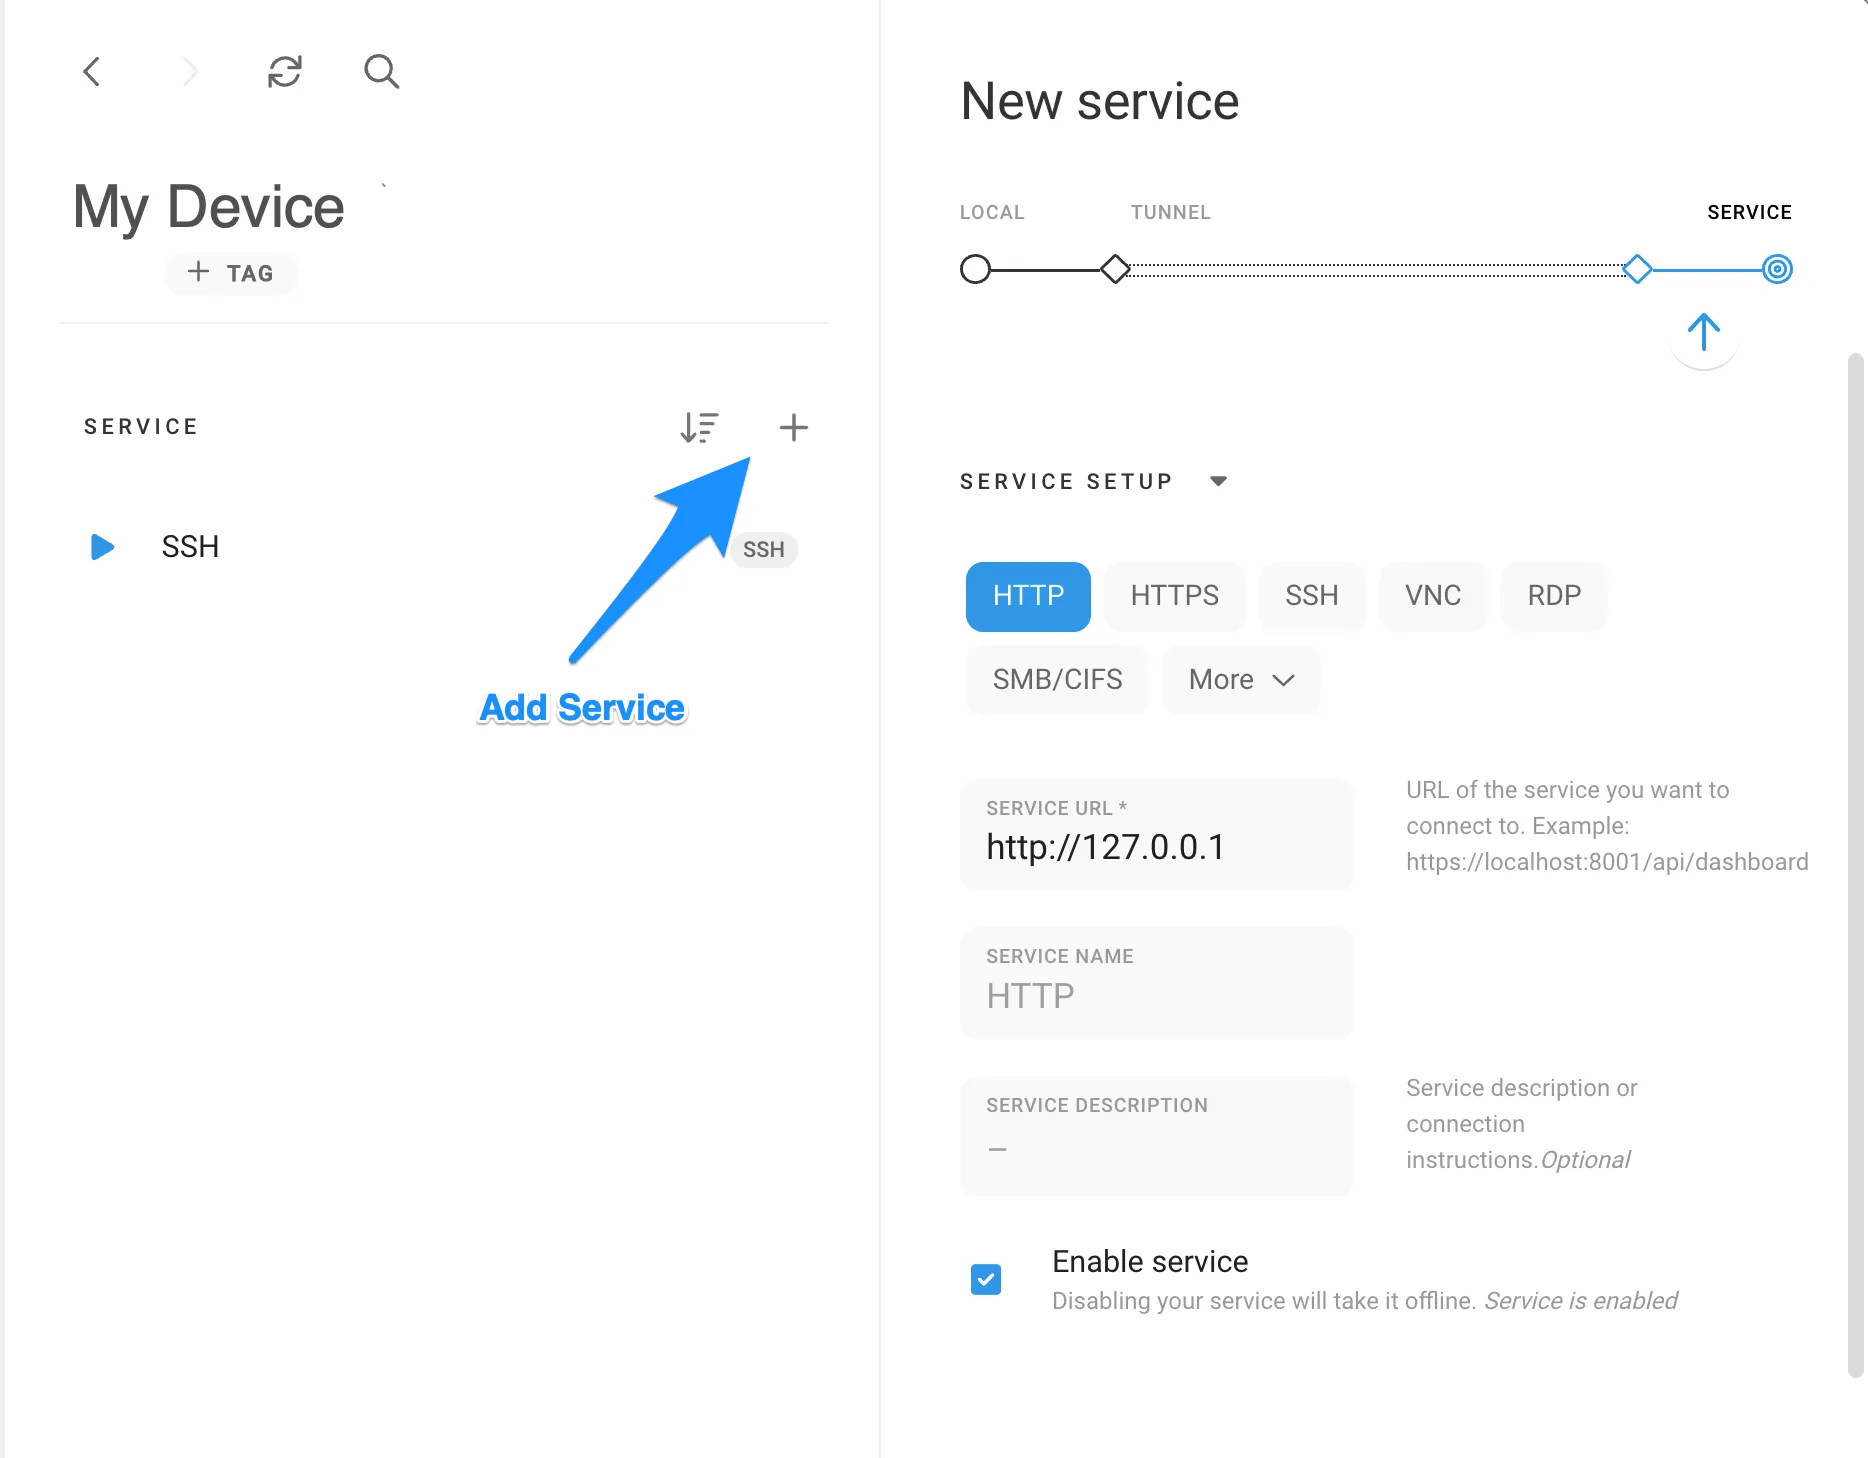
Installing Remote IT on Raspberry Pi
Installing Remote IT on your Raspberry Pi is a straightforward process. Follow these steps to get started:
Step 1: Access the Raspberry Pi Terminal
Open the terminal on your Raspberry Pi. You can do this either locally or via SSH if you've already set it up.
Step 2: Download the Installer
Run the following command to download the Remote IT installer:
curl -fsSL https://remote.it/install | sh
Step 3: Complete the Installation
Follow the on-screen instructions to complete the installation process. Once finished, your Raspberry Pi will be registered with Remote IT.
Ensuring Proper Connectivity
For Remote IT to function correctly, it's crucial to ensure proper connectivity. Here are some tips to optimize your setup:
Check Network Configuration
Verify that your Raspberry Pi is connected to the internet and can communicate with the Remote IT servers. You can test this by pinging a public server:
ping google.com
Firewall Settings
Ensure that your network's firewall allows outgoing connections to the Remote IT servers. Most modern routers and firewalls should work out of the box, but it's always a good idea to double-check.
Security Best Practices
Security is paramount when dealing with remote access. Follow these best practices to protect your Raspberry Pi:
Use Strong Passwords
Create strong, unique passwords for your Raspberry Pi and Remote IT account. Avoid using easily guessable information like "password" or "123456."
Enable Two-Factor Authentication
Two-factor authentication adds an extra layer of security to your Remote IT account. Enable it through the Remote IT web interface.
Regularly Update Software
Keep your Raspberry Pi OS and Remote IT software up to date to ensure you have the latest security patches and features.
Troubleshooting Common Issues
Even with careful setup, issues can arise. Here are some common problems and their solutions:
Unable to Connect
If you're unable to connect to your Raspberry Pi via Remote IT, check the following:
- Internet connection on Raspberry Pi
- Correct device ID and credentials
- Firewall or network restrictions
Slow Connection
A slow connection could be due to network congestion or bandwidth limitations. Try connecting during off-peak hours or using a wired connection instead of Wi-Fi.
Alternative Remote Access Solutions
While Remote IT is an excellent choice, there are other remote access solutions you might consider:
TeamViewer
TeamViewer is a popular remote desktop solution that supports Raspberry Pi. It offers a user-friendly interface and robust features.
AnyDesk
AnyDesk is another reliable option for remote access. It focuses on speed and performance, making it ideal for demanding tasks.
Real-World Use Cases
Remote access to Raspberry Pi has numerous practical applications. Here are a few examples:
Home Automation
Use your Raspberry Pi to control smart home devices remotely. With Remote IT, you can manage your home automation system from anywhere.
Remote Server Management
Set up a Raspberry Pi as a home server and access it remotely to manage files, databases, or applications.
IoT Projects
Develop and deploy IoT projects using Raspberry Pi and monitor them remotely using Remote IT.
Conclusion and Next Steps
Connecting to Raspberry Pi using Remote IT is a powerful way to enhance your workflow and unlock new possibilities. By following the steps outlined in this guide, you can set up secure and reliable remote access to your Raspberry Pi with ease.
Remember to adhere to security best practices and regularly update your software to ensure a safe and efficient setup. Share your experience with Remote IT and Raspberry Pi in the comments below. For more tips and tutorials, explore our other articles on Raspberry Pi and remote access solutions.
Happy tinkering and stay connected!

Raspberry Pi Connect Beta Access your Raspberry Pi from anywhere
Raspberry Pi How to Connect Guide

How to Remote Connect to a Windows PC From a Raspberry Pi
